Custom
Storage Boxes
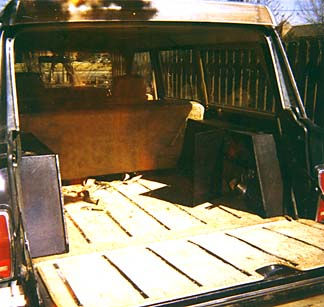
Ever wanted more
storage space, without losing the cargo room?
Well, I think I have found the solution. Custom made storage
boxes.
Things
you will need:
1) 1/2" plywood
- 1 sheet
2) Nails or screws (your preference)
3) Two (2) sets of metal hinges (come in packs of 2)
4) Two (2) clasps (to hold the door closed)
5) 6 to 8 Metal Screws (for mounting)
6) One piece of cardboard
7) Sand paper
8) Paint to match
 Other
items:
Other
items:
1) Circular Saw
2) Jig Saw
3) Drill
4) Tape measure
5) Protractor
6) Pencil
First, click
here to download specs.
Start with
the front of the box by measuring the bottom length. Next the
left side at a 70° angle, and so on. Once the measurements
have been drawn on your plywood, cut it out using a circular saw.
Next measure the distance for the door and cut it out. Now you
have the three pieces for the front.
On to the
back of the box. Take a piece of cardboard and cut it to match
the curve of the wheel well. It make take a couple of tries to
get it right. Once the proper curve has been achieved, transfer
the curve to your plywood and the other specs. Set all of your
other measurements and cut it out. You will need the jigsaw for
the curve portion, but a circular saw can be used for the rest.
Next you need
to create the two panels that make up the middle. Following the
measurements, cut the two panels. You will need the make a 70° angle
cut on the ends, so the wood butts-up at the back.
At this point,
if you want a shelf, you should make those cuts as well. I added
one shelf that was 8.5" wide by approx. 18" long. Depending
on how far up or down, you want to put your shelf will effect
the length.
Now that all
of the panels have been cut, it's time to sand. I gave mine a
good sanding because the circular saw can tear-up plywood pretty
good.
Now you can
put it together. By using nails or screws (your preference) begin
by taking your middle panels and attaching them the the back panel.
I left a 1/4" from the top, so it creates a lip. You may
decide to have it flat. The back middle panel needs to line up
on the bottom corner. If you decide to make it flush, then you
will need a third middle panel (2" long) to go at the bottom
of the back. Look at the specs, and you'll see what I am talking
about. Next attach the shelf at the height you wish. This will
give some extra support for the front panels. Now attach the front
panels making sure to leave enough room for the door.
If you have
back speakers for your stereo, you will need to use your jigsaw
to cut holes in the top middle panel. Take out your speaker and
measure before making your cut. I made my cut in the far back
corner. You can, of course, move the hole to wherever you wish.
I recommend
painting at this point. Once painted, attach the door with your
hinges and clasps.
Installation
begins with the removal of the cardboard covering that covers
the wheel well. Take the box and put it into position. It should
pop right in, depending on the thickness for your carpet. Once
in place, take your drill and a small bit and drill through the
wood and into the little metal flap that once held the cardboard
covering. This way your metal screw will line up perfectly. I
used three points to hold it in place. The front, right beside
the back seat, the top middle and the bottom back.
For the other
side, follow the same proceedure. Only when putting it together,
flip the front and back panel.
Toby